|
|
|
Making a silk purse from a...
-or- Necessity is the Mother of invention.
Sometimes
you are looking for a texture and can't find or capture the right looking image.
Sure we could do it from scratch but using an image from real life shows more
realistic and less "Cartooney",
than ones made from scratch, besides the time it takes to do it the 'other' way.
Also, ask yourself, how long do you spend after making the custom image, trying
to dirty it up to look more realistic?
There is a middle road, and besides resizing, tiling the image, setting color
depth and exporting to the right format.
There are other things you will find your self doing to captured images since
they aren't always looking as picturesque as you wanted.
This tutorial shows an example of how you can take from one image to make another you can use.


Image Copyrights (c)2001 Ken Deel & OtherWorlds InterActive.
[ A ] [ B ] [ C ] [ D ] [ F ]
[A] starting with the image I wanted to salvage and make into something I want: A household door lock plate. This texture may come in handy as is elsewhere but I need some nice looking textures for some of my doors in the UNHOLY's (tm) Whintworth Mansion game level
[B] Time to get working with the rubber stamp tool. (Photoshop) or the clone
brush (paint shop pro), this will help erase area's i don't want on my final
texture.
Shown is that embossed lettering is the first to go. Doesn't have to be perfect
in this case. It will just look like it was sanded, worn or give it steel wool
look.
[C] Removed the other bolt hole. using the same method. this of course takes allot of practice and as I said don't over do it. On smaller things your extra hard work won't show, trust me here.
[D] Selected an area I want to copy and paste, as you see this is more clear as to what I want to do here in photo [ F ] next. (Sorry forgot the "E" PIC oh well; )
[F] In photo shop I pasted this and EDIT->transform->rotate 180
degrees.
Transform has to be used since simply selecting rotate in the image menu will
rotten the whole image and not the pasted piece. Make sure you have your image
set to 24 bit color and that this image is pasted as a layer. Since some paint
programs will still rotate the whole image if the newly pasted piece is NOT a
layer.
Shown, is the pasted portion already placed where I want it. An important note
is the you need to have the image straight square not shifted at an angel for
this tutorial to work right. It is recommend anytime you work with an image to
be changed especial detailed images to be tiled. Always start by rotating the
image until it is straight square.


Image Copyrights (c)2001 Ken Deel & OtherWorlds InterActive.
[ G
]
[ H
]
[ I
]
[ J ]
[G] Flatten all layers and use that ol' magical clone/rubber stamp tool to
touch up the added piece so it "blends" with the rest.
I usually sample an area very close to the seam and move over slightly and
rubber stamp a copy of the rim on that obvious seam.
Make sure your still in a 24 bit image so it can again paint a soft feather edge
that more easily blends in to the image.
[H] Shows more of the result of [G]
[I ] Since I changed the over all size and look of the lock set, I now need
to center the latch/ door knob hole to make it look right.
And look more importantly, like a household door lock. So I select it
carefully with a round instead of square select tool.
And SHIFT + left mouse drag it over until it looks centered.
[J] Again with the touch ups! Man so much of that! that is why you need to
practice this tool as much as possible you use it allot in texture creation.
[


Image Copyrights (c)2001 Ken Deel & OtherWorlds InterActive.
[ K ] [ L ]
[ K] For those who didn't look ahead, or don't have the artistic eye to see what the hell I am trying to do, here is where it comes to the final step. Select outline and crop the image where I wanted it to be. Now can you see a door lock plate?
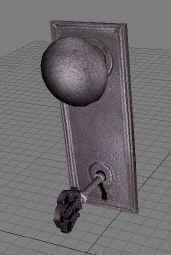
[ L ] ...Or maybe this will help. The applied texture to the model, this will
be affixed to a door in the game UNHOLY
(tm) and have a turn the key and rotate knob animation.
The appearance is to be an older antique look in silver. Rust, and peeling
silver can be added also.
Hope you found this to be some help.
- Ken Deel.